The biggest challenge I have faced since I first pointed my camera at an insect is getting the lighting right. It has been an ongoing battle for the past 10 years and I am still yet to taste complete victory, but through a lot of trial and error and a great deal of patience, I am now at a stage where I feel I’m gaining the upper hand and it’s all thanks to a few pieces of foam and plastic.
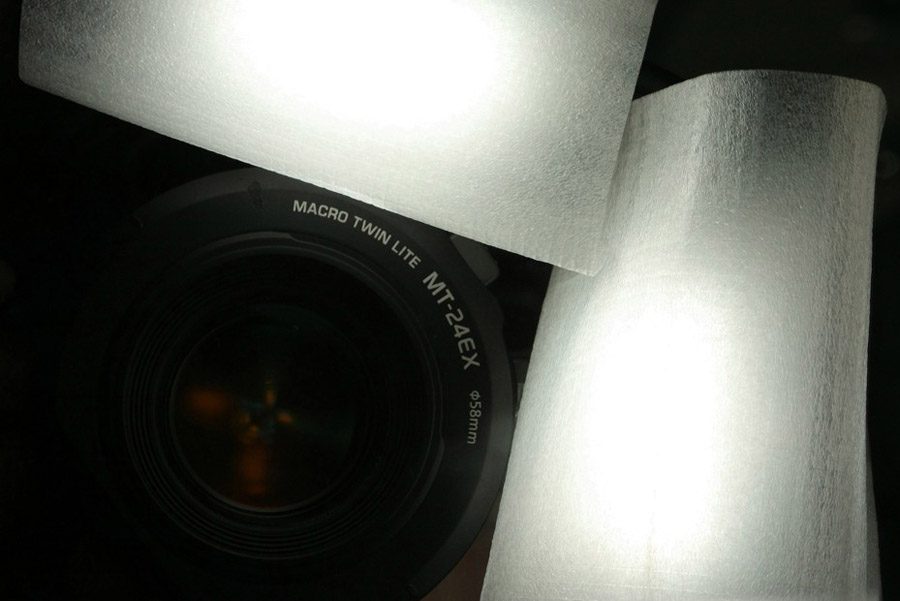
I like to get as much depth-of-field (DOF) as possible to keep as much of the subject in focus as I can. With any photographic subject, as the DOF increases, the amount of natural light decreases and this is especially noticeable at the macro level. To compensate for this, you can use a slower shutter speed, or a higher ISO, or a flash, or you can use a combination of all three. Everyone has their own preference, but I like to shoot at f14, 1/250th of a second with the ISO set at 250 or 320, which means I am usually very much in the dark and this is where the Canon MT-24EX Twin Lite flash comes in handy.
The MT-24EX is a flash unit that is purpose-built for macro photography. The two flash heads connect to a ring that sits on the front of the lens and the adjustable angles allow you to direct light onto the subject from different points, surrounding the subject with light and eliminating most shadows. The flash has various settings that control the power output, the ratio between one flash head and the other, and a few other things I have yet to fully explore, but despite all the settings, the light output is still quite strong, and when this is directed onto a subject that is particularly shiny, which many insects are, the end result is some very noticeable contrasts and ugly patches where the subject’s natural colour has been ‘washed out’ by a bright glare (specular highlights). It’s not very pretty and I find it downright frustrating.
So, what can be done about it? A diffuser is the simple answer. A quick search of the internet will reveal a host of commercially made diffusers, but offerings for the MT-24EX are very thin on the ground and I have only seen one so far. I can’t comment too much on it because I haven’t used it, but I have heard mixed reports about its effectiveness. Being very fussy with my photography, I don’t like spending money on something unless I’m convinced it’s going to do a good job, but all is not lost. The other option is to experiment with homemade diffusers, which can be constructed from materials costing no more than a few dollars.
I started off by searching the net for ideas on the subject. Some of the best macro photographers I know use their own home-grown diffusers and their ideas are as varied as they are clever. The basic idea is to spread the light as much as possible before it hits the subject, thus providing a broader, softer and more even coverage. I have experimented with various designs using different materials and I have settled on a rig that I think produces good results and is cheap, lightweight and easy to repair or replace. There is always room for improvement, but this is giving me my best shots to date.
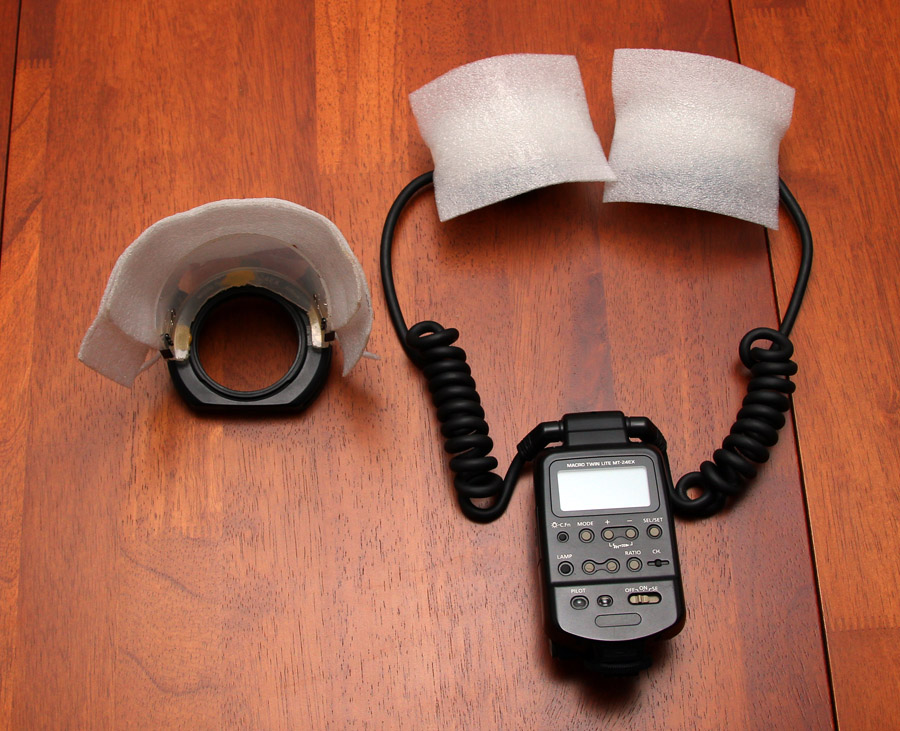
The ingredients: two Gary Fong puffer diffusers, one plastic measuring cup, some thin wrapping foam, adhesive Velcro, sticky tape and a couple of small bulldog clips. Apart from the puffers, which were around AUD $30 for the pair, the rest of the material cost about $15 in total, but only because I bought 2 meters of wrapping foam to allow for future repairs or new designs.
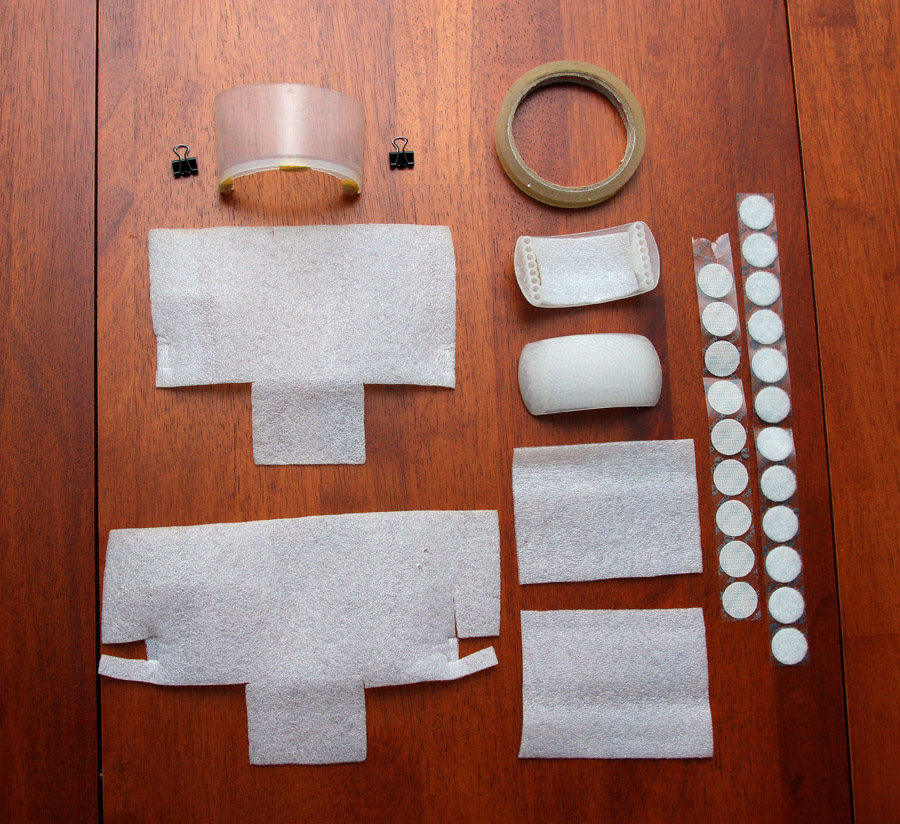
The measuring cup has been cut down to about 50mm tall and then it has been cut in half sideways so that it’s semicircular. The base has mostly been cut away, but I have left a lip about 10mm wide to accommodate some pieces of Velcro, which will stick to Velcro on the ring that attaches to the front of the lens and holds the flash heads.
The two larger, irregular-shaped pieces of wrapping foam go one on top of the other (in the image above, the piece at bottom left goes on top of the piece above it) and they are held in place on the plastic cup with bulldog clips, with the widest edge of the foam protruding 50mm out past the end of the cup. All up, the foam sticks out about 100mm past the front of the lens, which is the maximum focal distance for the MP-E 65mm macro lens at 1x magnification. The rectangular pieces of foam are taped to the front of the Gary Fong puffers, plus two smaller pieces line the inside of the puffers. There are also pieces of Velcro on the inside edge of each puffer. The puffers will stick to Velcro that has been attached to each side of the flash heads.
The images below will show you how it all fits together. Click on each photo to see a larger version.

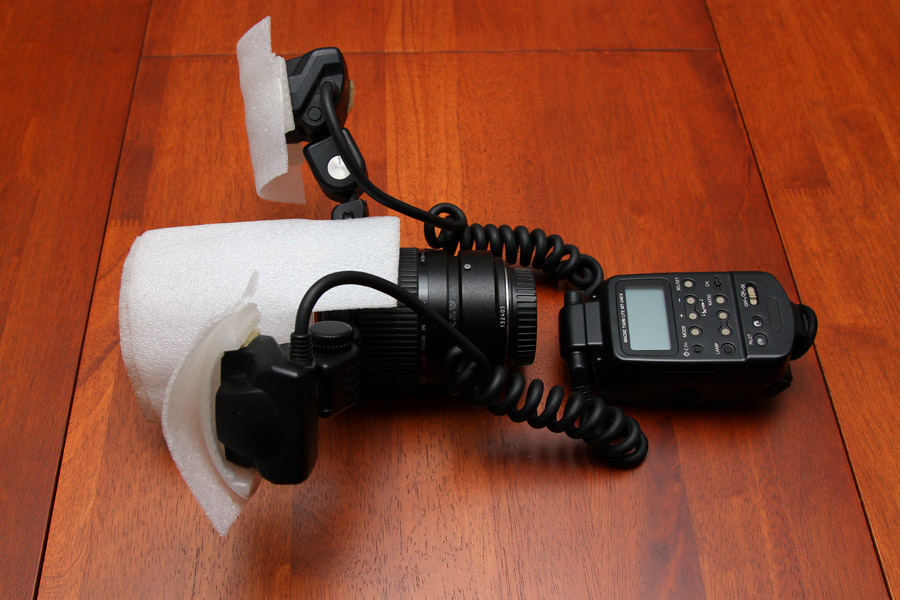
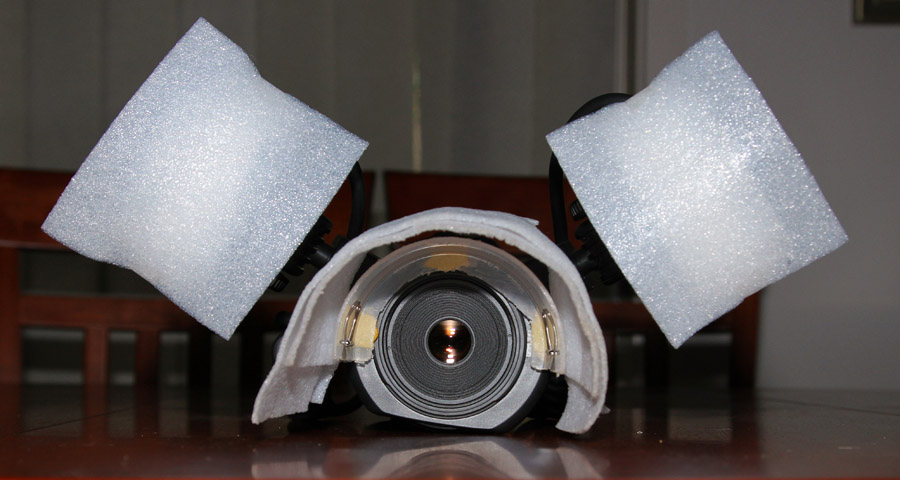
And that’s my diffuser. The puffers and foam on the flash heads soften and spread the light and then it is softened further when it passes through the layers of foam protruding from the front of the lens. The advantage of the foam is that it is lightweight and flexible, so it doesn’t hinder me when I have to get right up close. The obvious drawback is that it hangs out over the subject, which isn’t always appreciated, but I have found that with very slow, cautious approaching, I can get close enough to most creatures, even some of the flightier ones such as damselflies and wasps.
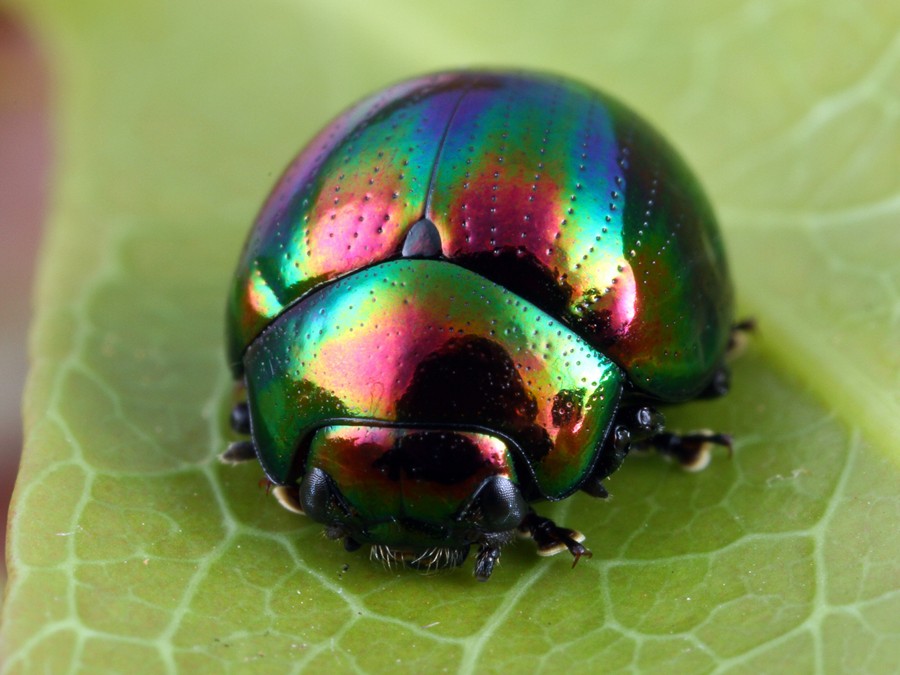
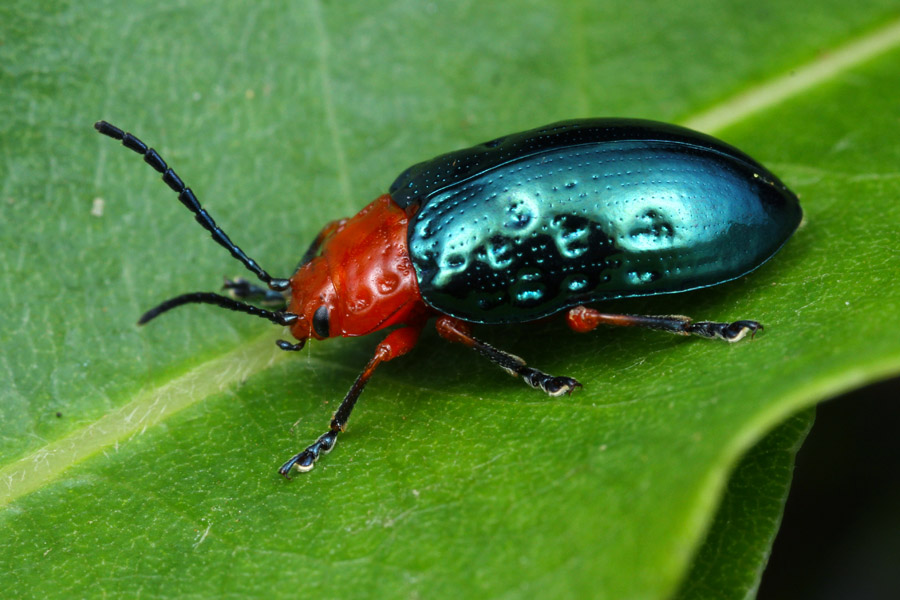
So, let’s take another look at the Lamprolina leaf beetle. This was shot at 1/250th of a second, f14, ISO 250 and the flash set at -1 with an even power ratio between the flash heads. A vast improvement, I reckon.
Please feel free to drop me a line if you have any questions. You can send me an email via the CONTACT PAGE.